A complaint I hear everywhere I go concerns the filling and use of multiple water tanks. I bought a second-hand Traxx with dual 95-litre tanks. Typically, I can only fill one tank. Sometimes, I can try various “fixes” and get the second tank to fill. I still only have one tank to empty as we need and use water.
Select an image for a larger view. Maps are linked to dynamic originals.
The Problems
Air Vents

Air must escape from the top of the tank for water to enter. It would be great if the tank had a hole in the top, but if we did that, a lot of water would slosh out when we took corners or hit a bump. Spilling water on the road is also illegal in Australia.
Caravan tanks have threaded vent holes near the top to resolve this issue. Running a small-diameter tube from these vents to an open exit near the filling nozzle is standard in a single tank configuration. You know the tank is full when water runs out of the vent exit, which is high enough to stop water from draining from the tank during travel.
The only minor problem is attempting to fill too quickly. If you fill faster than the air can escape from the vent, water will return to the filling point.
Things get much worse with multiple tanks, particularly with a single fill point. The second tank is usually behind the wheels, with a vent tube far from the filler location. There are not many other places high enough for the vent exit.
Filling both tanks will also leave water in the vent tubes. If the longer tube has low points, it holds water and effectively blocks venting. As you use water, the tank without a clogged vent will be the only one active. When the first tank is dry, the pump sucks air, leaving the second tank unused.
Balanced Tank Use

You can make two or more tanks have equal water by connecting them at the lowest point with a hose that never rises above the bottom of the tank. This assumes that the vent issue has been resolved. Balanced tanks help make a balanced caravan.
Both tank outlets will join together before connecting to the water pump. Unfortunately, this often means the connection point is above the tank outlets. It should still work, but should is one of those magic words.
One Solution
I could not find an easy solution that worked consistently. Venting came first.
Air Vents
I replaced the small vent attachment to the tank with one of equal size to the one used to draw water. Because I was restricted to the available hardware, I used 19mm irrigation piping. There is a simple rule – vent pipes can go up but never down unless the down is to open air. I replaced the vent director with a 3/4” BSP male to 19mm barbed tail. Each tank runs a 19mm poly pipe. It is stiff, making following this rule possible.
Front Tank

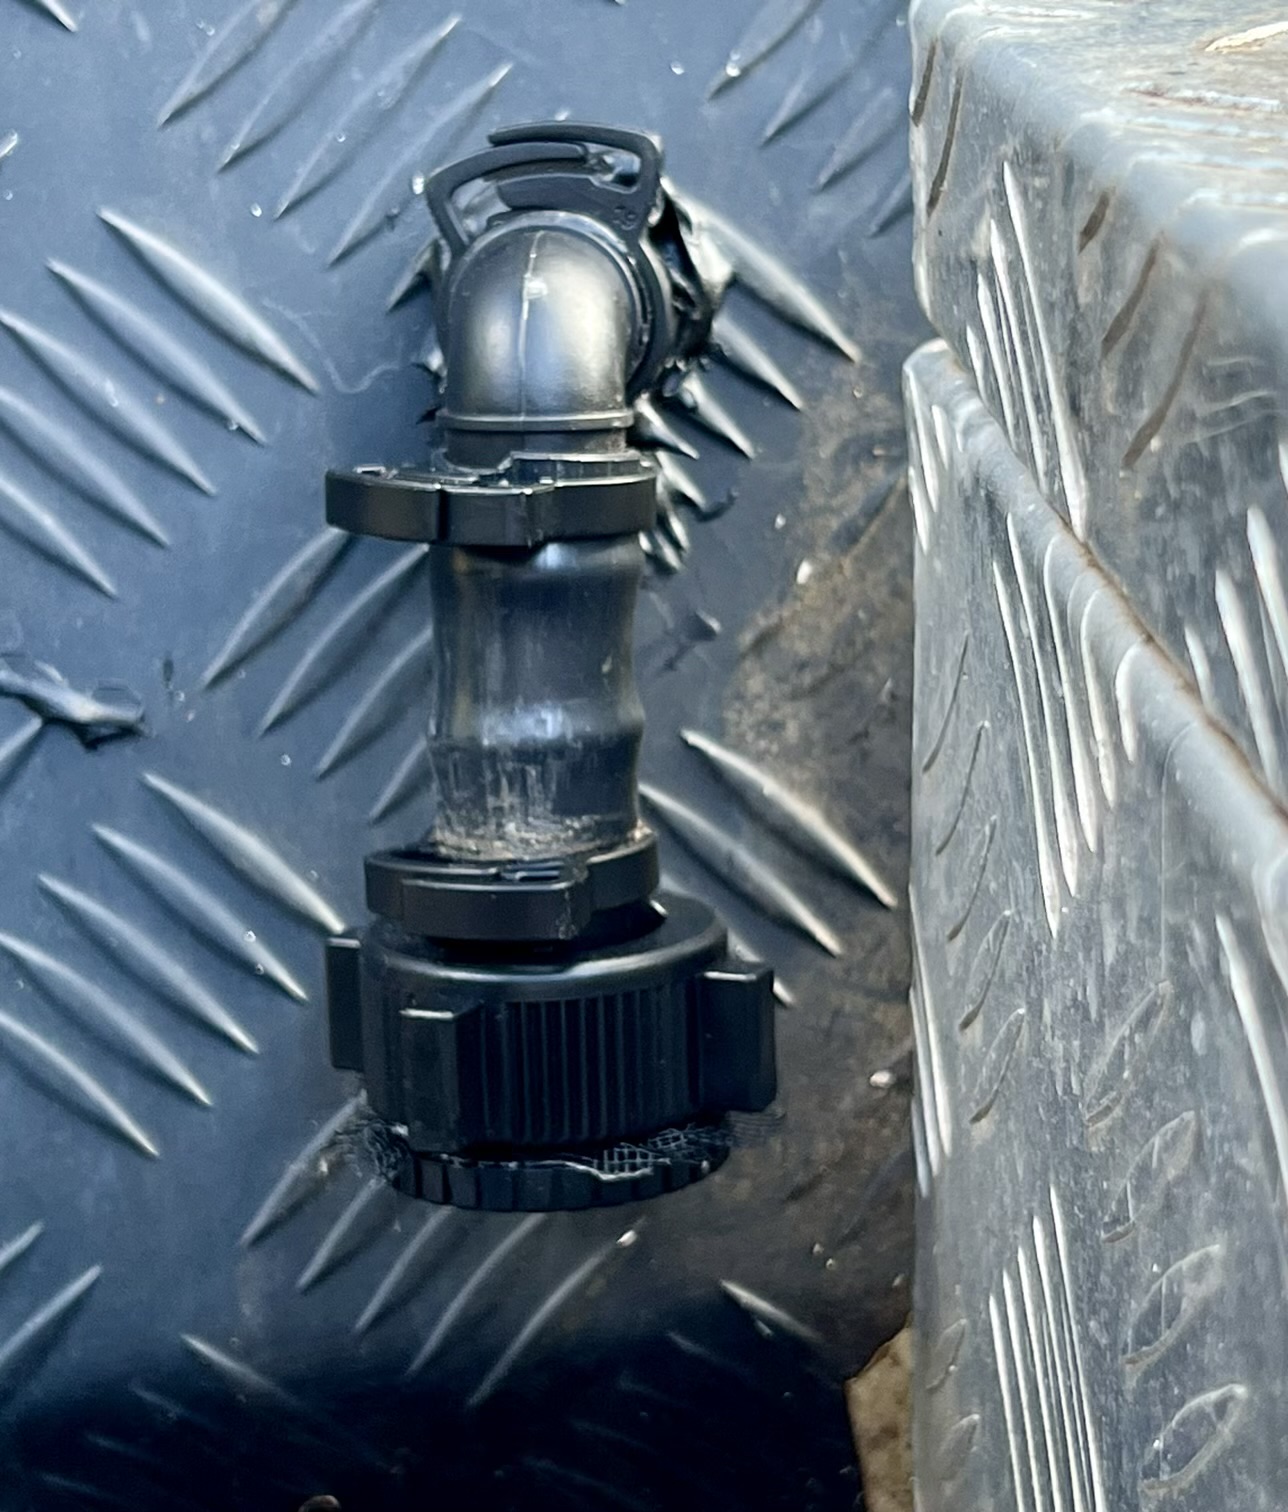
I could keep the pipe level for the front tank until I reached the tunnel. I could go up inside the tunnel to provide height, then straight forward through the front bulkhead. Facing the exit down makes sense, as does covering the exit with a fly screen.

Do you like using a hose connector for two-sized taps as a fly screen trap? It’s easy to install and easy to clean.
Rear Tank

The rear vent was more problematic. The rear chassis was between the tank vent and the vehicle’s rear. Going into the washing machine cavity and out the back wall was too complicated. How do I remove the washing machine? I chose to go through the chassis. I used a bi-metal hole saw. It cuts through the chassis relatively easily. The vent comes out behind my rear box, going up to ensure water will not escape, and then a U-turn is used to attach the insect-screened exit.
Tank Water Level Balancing

Water level balancing is optional. The connections to the pump may do the job well enough.
I am a belt-and-braces kind of person. I want the tanks to have equal water after a shower from the one tank closer to the pump. If a tank is empty, the pump will run dry and not pick up water from the second.
My tanks have 3 by 3/4” BSP female thread holes. The one on top is for the vent, one on the bottom connects to the pump to provide water, and the other was not used. Sometimes, the second lower connection drains the tank for cleaning.
I connected the unused or drain holes together. The two tanks will contain the same amount of water as long as the vents are both operational. They are connected with reinforced food-safe hoses. Mine is 13mm, and I need a 3/4” BSP for the 13mm director.
I use a generous helping of thread seal (plumber tape). We don’t want to lose our drinking water. While I used irrigation clips for the vents, suitable quality hose clamps are a better choice for the balancing pipe.
There is a different rule for this pipe. It must not be higher than the water tank entry point, so the connections to the pump are often less than perfect. In my case, the rear tank hose was connected to the chassis near the top of the tank. As you can see from the photograph, I am running the hose lower. It is still not as low as the suspension support. It will be OK for all but the most extreme off-road travel – well beyond my capabilities.

The rear tank hose includes a junction, tap and hose connector for easy draining of both tanks. If you are brave or confident about the system, you can fill the tanks this way. It can be a lot faster than gravity feed through the filler. The only risk is if both vents are clogged. The tanks would blow up like balloons. They could potentially burst or even damage the floor of the van.
Filling Issues
You can perform a check when filling by gravity or mains pressure. All is well when water points out of the front and rear vents, indicating that the tanks are full. Check your water levels if only one vent overflows. If one tank has not been filled, that vent will be clogged.
With the system described above, the most likely culprit is the flyscreen – especially if the exit is where dust can collect and is ready to turn to mud. Unscrew the cap and remove the screen. Either clean or replace the piece of screen.
If it is not the flyscreen, it must be the 19mm pipe, which is unlikely, given the diameter. Look for kinks. Check if the pipe has sagged significantly (19mm or more). It will only be a problem for gravity feed since mains pressure feed would blow the trapped water out.
If the problem persists, then:
- Remove the flyscreen
- Detach the vent from the tank
- Use a garden hose to clear obstructions with water pressure
- Attach the vent hose back to the tank
- Put the flyscreen back on
You will have a serious tank problem if the obstruction is green slime. Clean or replace the tank immediately. This is extremely unlikely, particularly if you use a filter when filling the tank.